When you followed Install the IDE, the extension found your compiler without being told anything. In this tutorial you will look at why that worked, and learn what to do when it cannot: on a machine with no package manager, or in a project that has to be built with one specific compiler version.
‼️ The extension does not contain a compiler ‼️
The extension carries its own language server, which is what highlights your .jd files, validates
them as you type, and answers completion, hover and go-to-definition. But the moment you ask for a
picture, a preview, an export or the diagnostic view, it has to hand your model to the jpipe
compiler and wait for the answer. That compiler is never in the box.
This is a deliberate choice, and a security one. Bundling the compiler would mean that installing an editor plugin silently drops an executable onto your machine and runs it, which is precisely the supply-chain move that makes extensions worth worrying about. We would rather ship no binaries at all. By default the extension runs a compiler you installed, from a channel you already trust: Homebrew, an Ubuntu PPA, or Scoop, each of which you can inspect, pin, update and uninstall with the same tooling you use for everything else on that machine. Nothing arrives behind your back.
That leaves the interesting case, the machine where you cannot install anything. There the extension
can fetch a compiler for you, but only when you ask it to, by name: managed mode is that request,
made explicit. The section below covers how it works.
One question, three answers
Every time it renders, the extension has to answer one question: where is the compiler? The Execution Mode setting, at the top of the plugin settings page, is where you answer it, and there are three possible answers:
cli: “it is already on this machine, and the system knows where.” The extension runs thejpipecommand, letting yourPATHresolve it, exactly as your terminal would.jar: “it is this exact file.” You give it the path to a compiler JAR, and it runs that JAR with yourjava.managed: “you go and get one.” The extension downloads a published release and keeps it in its own private storage.
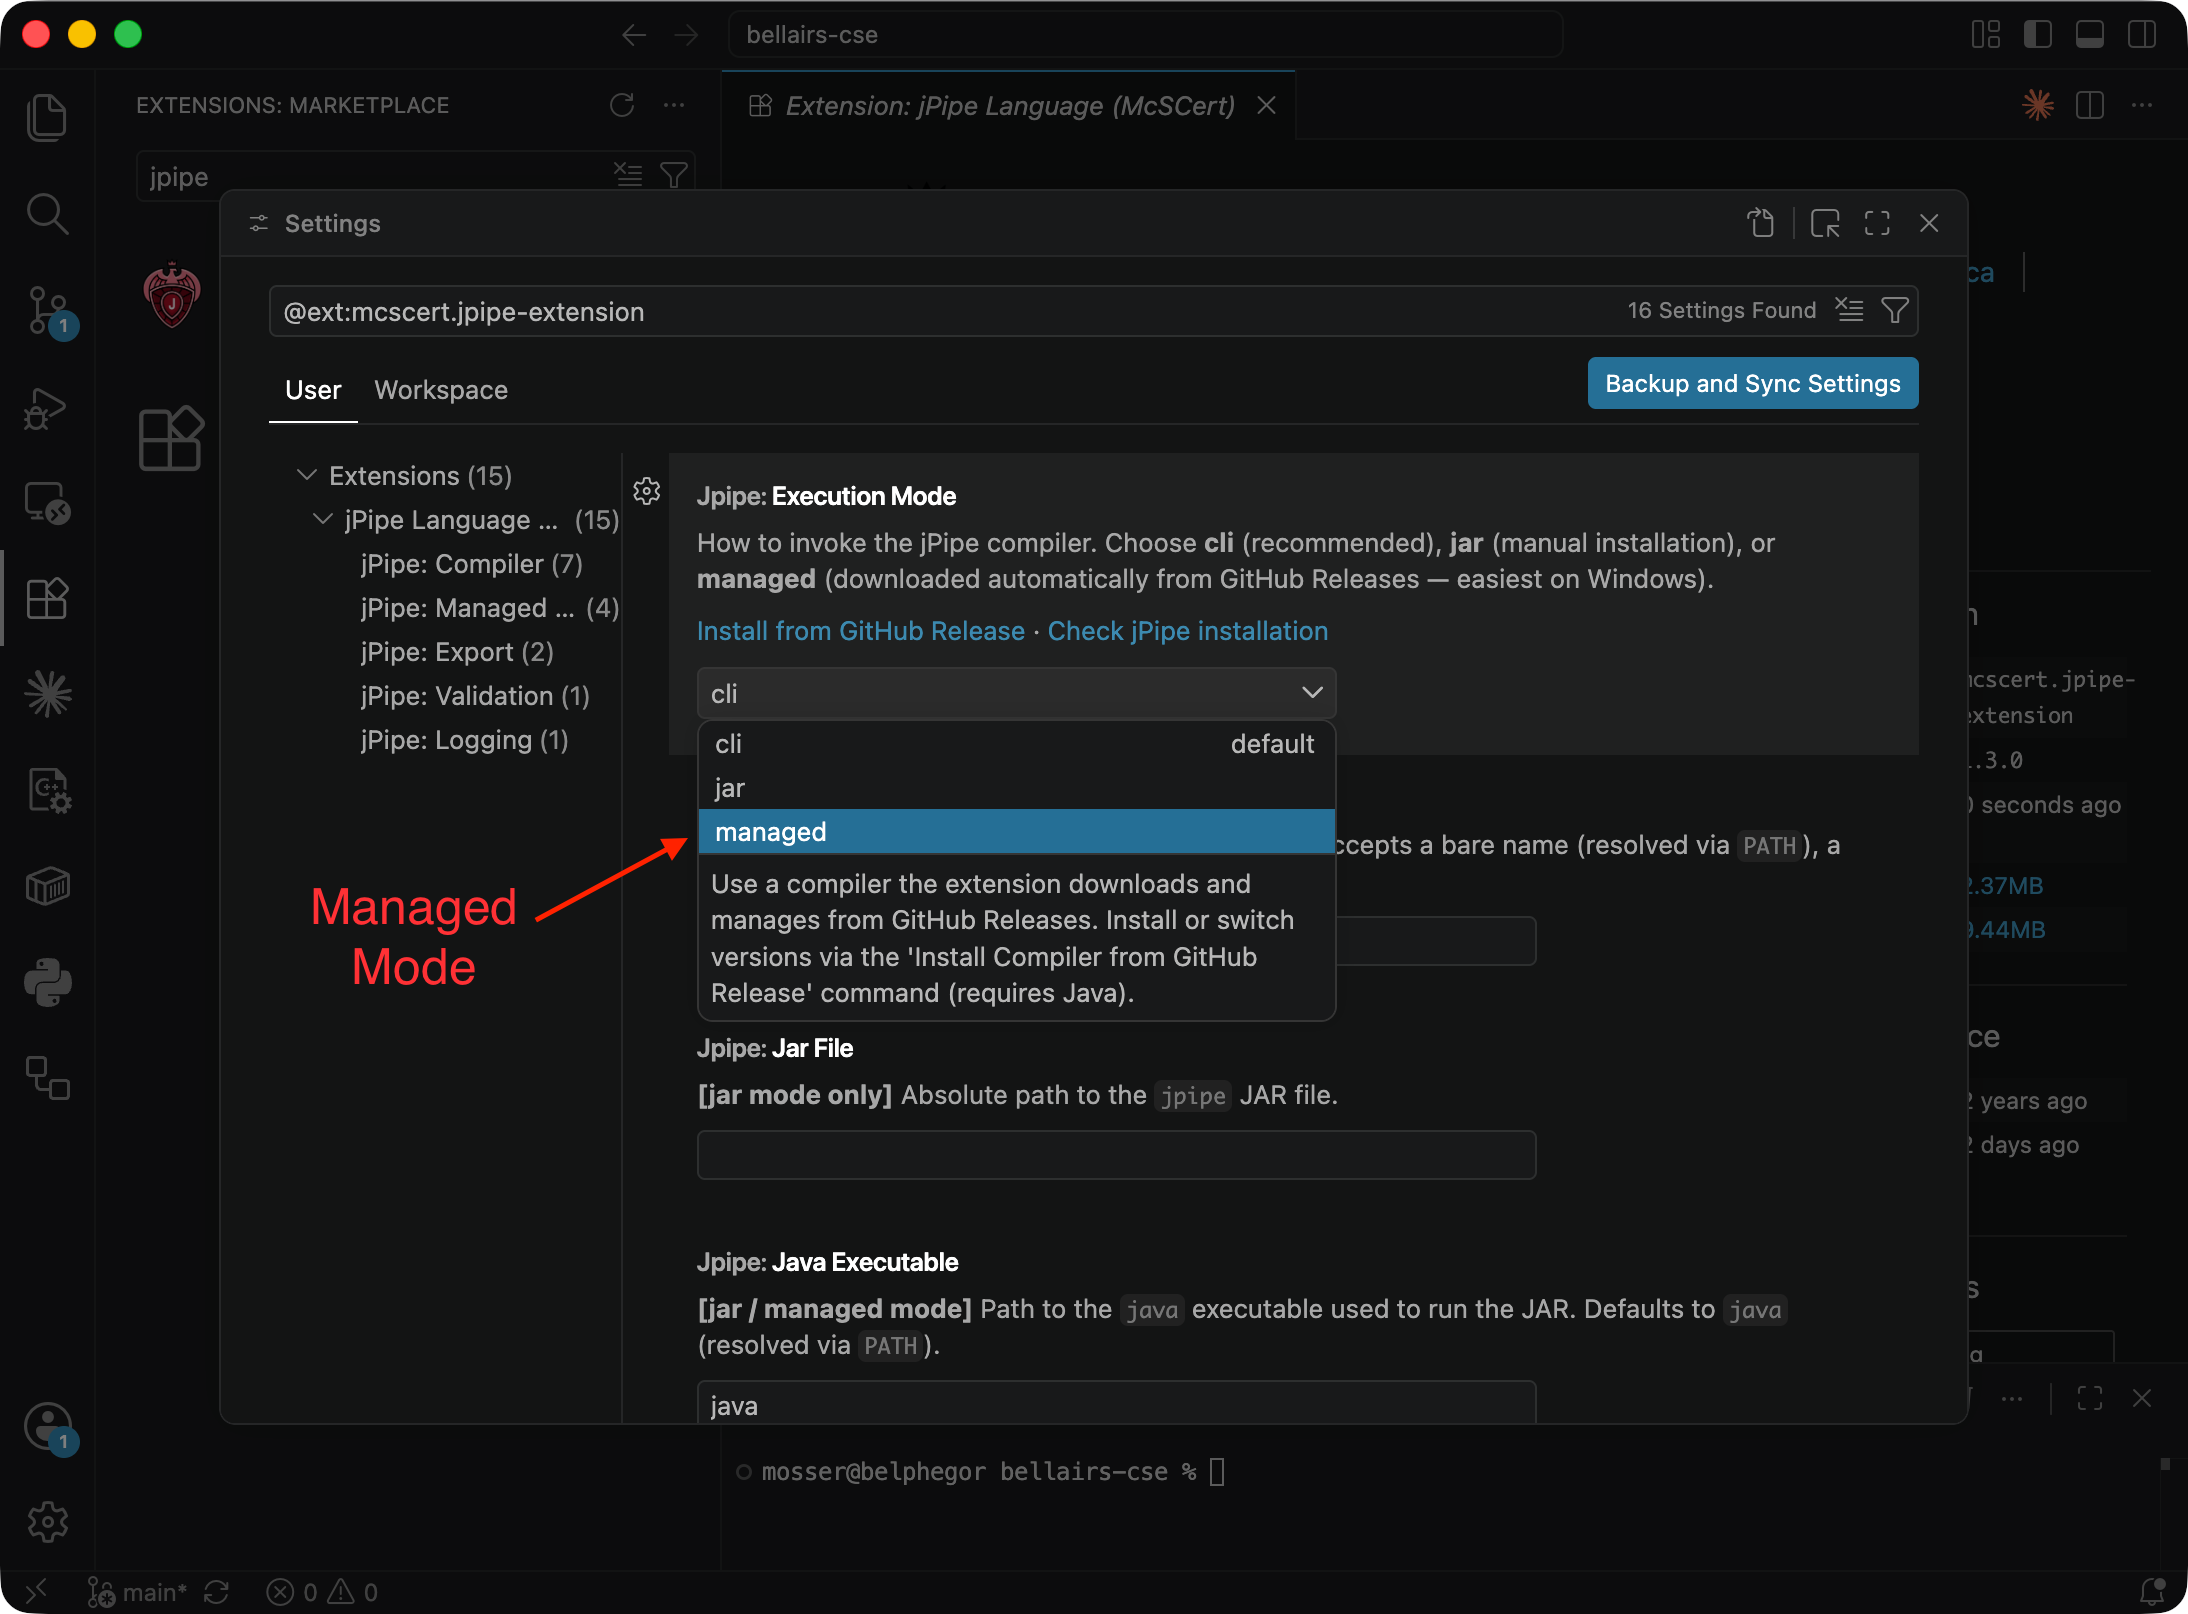
Notice what the three answers have in common: they all end with a compiler running on your
machine. None of them installs the two things that compiler needs, Java 25 or newer and
Graphviz. Changing modes changes where the compiler comes from, never what it runs on, so if a
preview fails for a missing dot, switching modes will not fix it. Installing with
a package manager is the one route that brings the runtime along.
Take the tour of the three modes below in any order. Each one explains what it is for and the single setting that goes with it.
💻 cli: the compiler you installed
This is the mode you are already in, because it is the default. It has exactly one setting, CLI:
Path, and it starts as the bare word jpipe.
A bare word matters here: because it is a name and not a location, the extension hands it to the
operating system and lets your PATH resolve it fresh on every run, which is how it found a
compiler you never told it about. It also means your editor and your terminal are guaranteed to be
running the same binary, so a model that previews correctly cannot fail in your build for a
version-mismatch reason.
Change CLI: Path to an absolute path when you keep jpipe somewhere your PATH does not
reach, or when you have several compilers installed and want the editor to use one in particular:
/opt/jpipe/2.3.0/bin/jpipe
If a preview suddenly fails in this mode, run jpipe doctor in a terminal first. cli mode makes
that a genuine diagnosis: the terminal and the editor are looking at the same compiler, so whatever
the terminal reports is what the editor is hitting too.
☕ jar: a JAR you point at
Reach for this mode when the compiler you want to use is a file rather than an installation, which
in practice means you built it yourself. If you have cloned the compiler and run mvn install (see
from source), your fresh build is sitting at
jpipe-cli/target/jpipe-cli-<VERSION>.jar, and this mode lets the editor preview with it.
Three settings apply:
- JAR: File, the absolute path to the JAR. This is the one you must set.
- JAR: Java Executable, the
javaused to run it. It defaults to the bare namejava, resolved through yourPATH. Set it to an absolute path when thatjavais not the one you want, which is worth checking: a JAR built for Java 25 fails with an unhelpful error under an older runtime. - JVM Args, extra arguments passed to the JVM, for the rare model that needs a bigger heap.
Because the path points at one specific file, rebuilding the compiler updates what the editor uses with no further action. That makes this the mode to be in while you are working on jPipe, and the mode to leave once you go back to working with it.
📦 managed: a release the extension fetches
The other two modes assume you can put a compiler on the machine yourself, and keep it current yourself. This one hands both jobs to the editor: you pick a published release from a list, the extension downloads it into its own storage, and from then on it watches for newer ones and offers them to you.
That makes it the answer for a locked-down machine, where you can install a VS Code extension but not a package manager, and nothing lands outside the extension’s own folder. It is also what turns the compiler into something you can change your mind about: downloading a different release is a two-click operation, so you can move between versions as easily as you switch a branch.
Picking a version
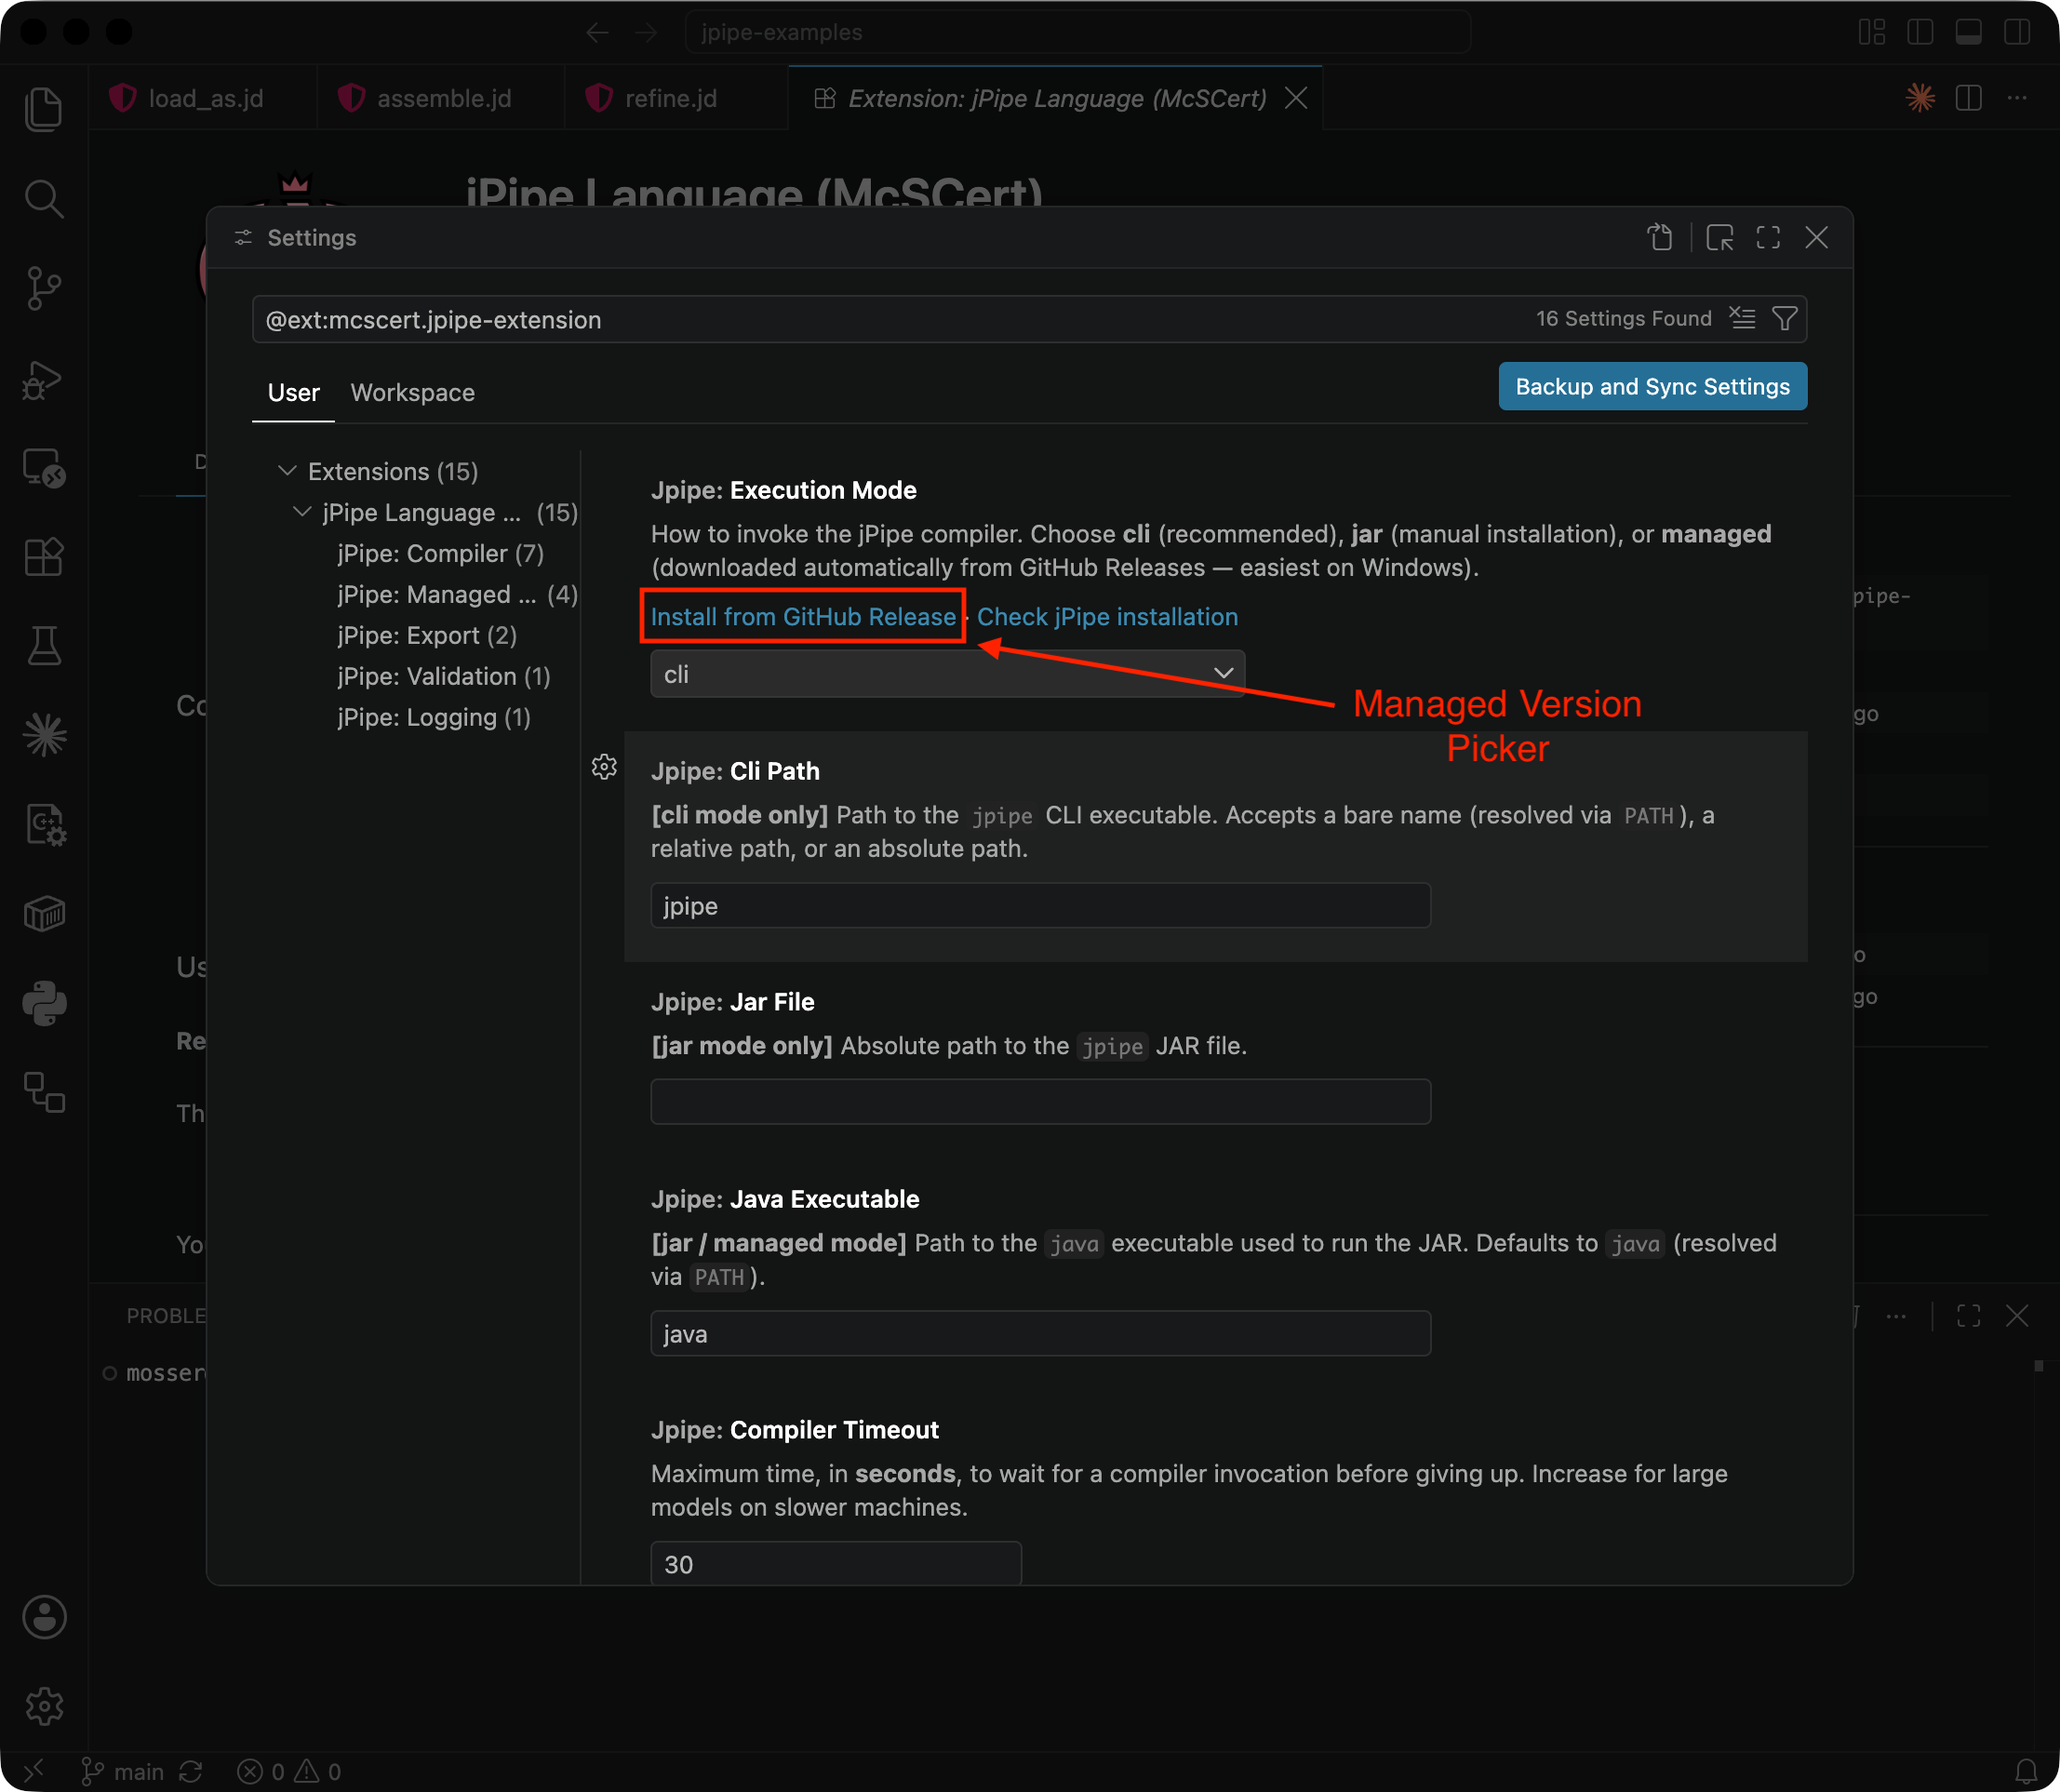
-
Click Install from GitHub Release on the settings page.
-
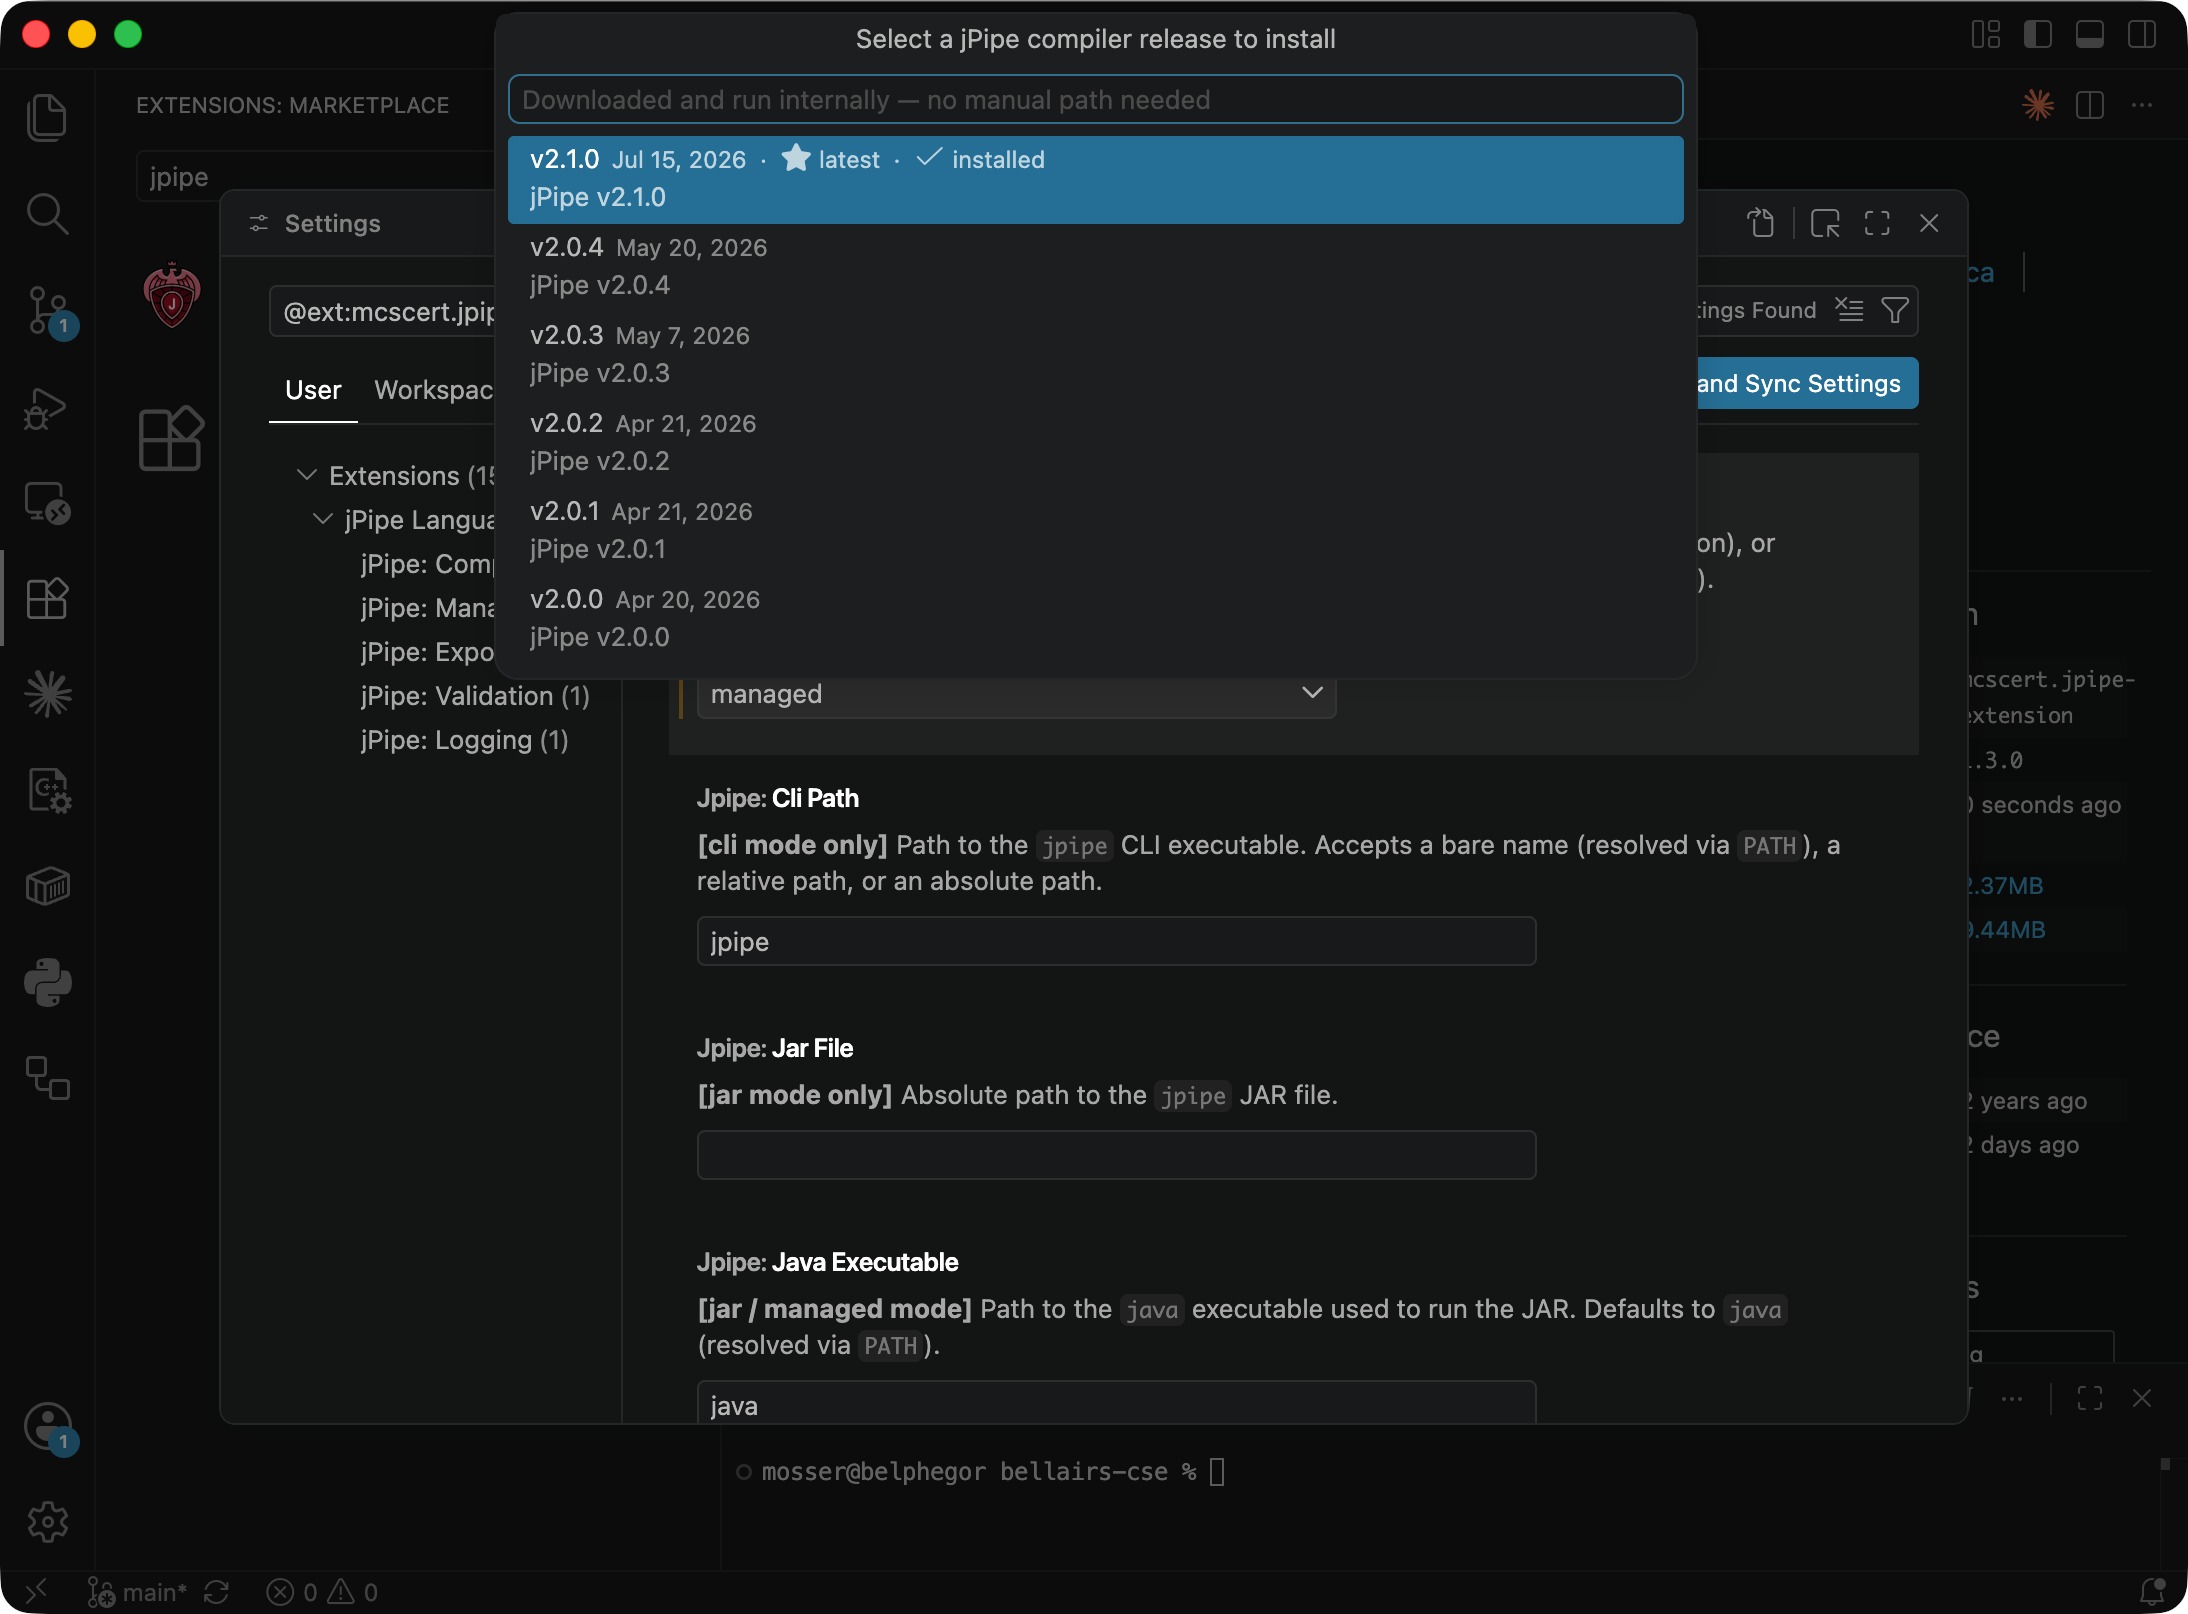
Choose a release from the list.
-
There is no third step. Once the download succeeds, the extension switches Execution Mode to
managedfor you and starts previewing with what it just fetched.
Click the same link whenever you want a different version. Releases you have already downloaded are reused rather than fetched again, so switching back and forth is quick.
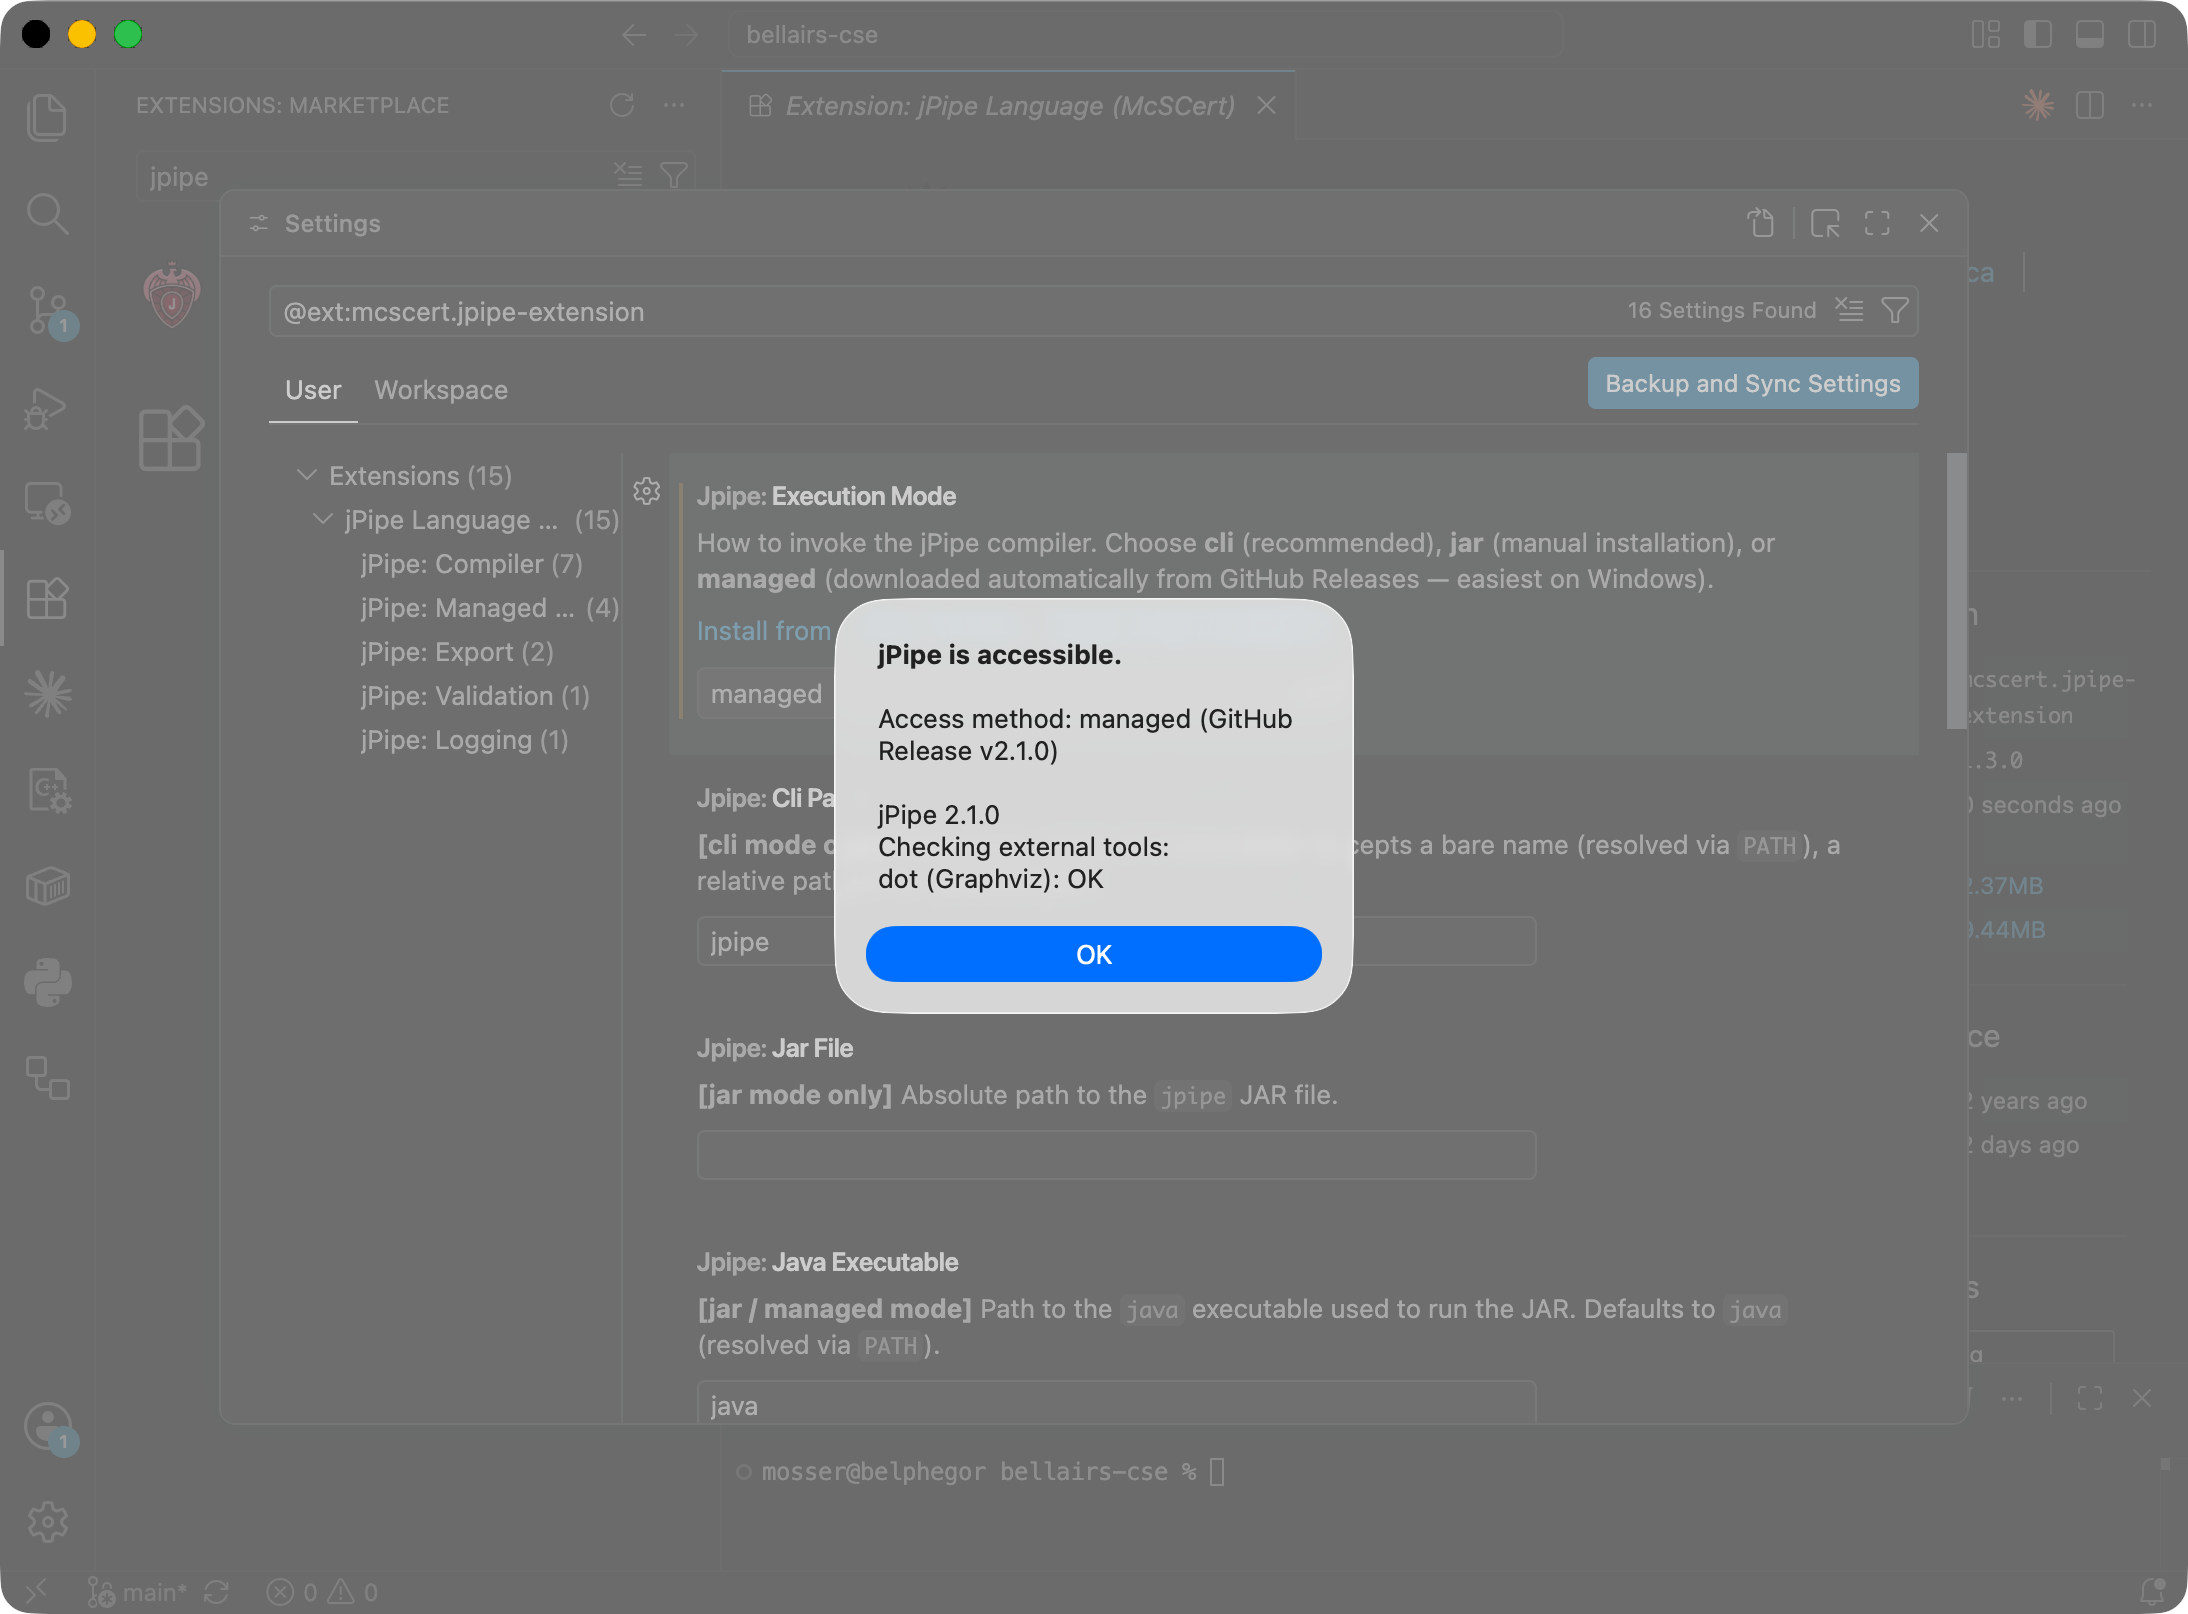
Check the result the usual way, with Check jPipe installation: the report now names the release it is running.
Being told when a new version ships
A compiler you installed by hand is a compiler you have to remember to update. This is the one mode that remembers for you: on startup it compares your release against the latest published one, and when yours is behind it offers the update in a notification. It never updates silently, so a version you deliberately chose stays put until you say otherwise.
Four settings shape that behaviour, all under jPipe: Managed Compiler:
- Check For Updates, on by default. Turn it off to freeze your compiler entirely.
- Update Check Interval Hours, 24 by default. The check runs at startup at most this often, so raising it makes the prompt rarer.
- Include Prereleases, off by default. Turn it on to see prereleases in the version list, which is how you try a build before it is announced.
- Repository,
jpipe-mcscert/jpipe-compilerby default. It points the picker at another GitHub repository, which means running that repository’s code: leave it alone unless you own the fork.
Pinning a project to a version
Everything above is a personal choice, but a version can also belong to a project. Because these
are ordinary VS Code settings, a workspace can override them: commit a .vscode/settings.json
alongside a model that has to be built with a particular compiler, and everyone who opens that
folder gets it.
{
  "jpipe.executionMode": "managed"
}
This is what makes the mode worth knowing about even when you do have a package manager: a
repository whose pipeline still builds with an older compiler can be edited against that same
compiler, while every other project on your machine goes on using the current one from your PATH.
Going back
Set Execution Mode back to cli, or delete the setting to fall back to the default, and confirm
CLI: Path reads jpipe. Downloaded releases are left where they are, so returning to managed
later costs nothing but the click.
Next steps
- Click Check jPipe installation once more so you finish this tutorial knowing which compiler your editor is using.
- Install the Runner to make your justifications executable, then run them in CI/CD.