jPipe is a language and toolchain for justification diagrams: structured arguments that
connect a top-level claim (“version 2.0 is ready to ship”) down to the sub-claims, strategies,
and evidence that support it. You write a model in a small textual language (a .jd file), and
jPipe renders it as a diagram you can read and review, then later execute against real data to
check that the argument still holds.
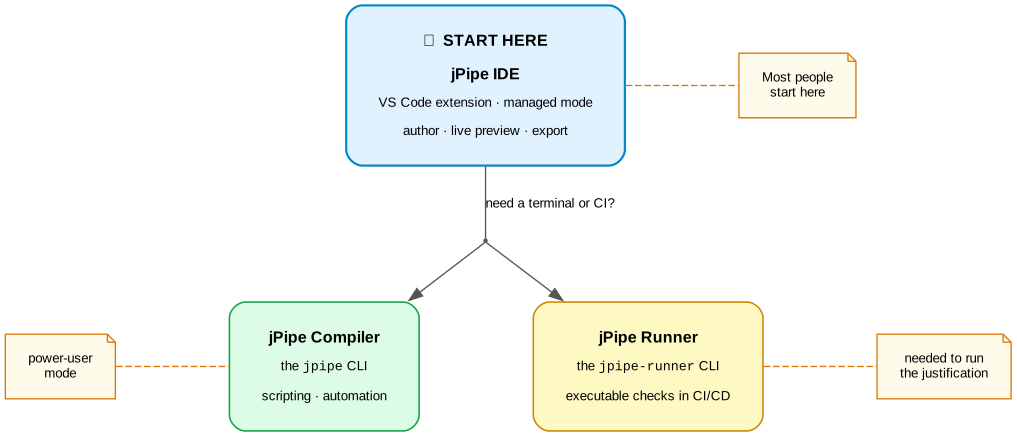
This section takes you from a blank editor to your first justification. Before you install anything, here is the map of the tools you will meet.
The three tools
| Tool | What it does | When you need it |
|---|---|---|
| jPipe Compiler | The jpipe command-line tool that parses, validates, and renders models. Everything else in jPipe runs on top of it. |
Start here: one package-manager command. |
| jPipe IDE | A Visual Studio Code extension to author .jd files, with syntax highlighting, a live diagram preview, and one-click export. |
Install it second. It finds the compiler on its own. |
| jPipe Runner | The jpipe-runner tool that turns a justification into an executable check against real data. |
When you want the argument verified automatically, typically in CI/CD. |
Where to start
One command installs the compiler, and it brings Java and Graphviz with it: our Homebrew,
APT and Scoop packages declare both as dependencies, so you never chase a runtime by hand. The
extension then picks that compiler up with no configuration at all, because it looks for a jpipe
on your PATH out of the box.
- Install the compiler:
brew,aptorscoop, one line. - Install the IDE: the extension, with nothing to configure.
- jPipe 101: write, preview, and export your first justification.
Locked-down machine, no package manager, or a project pinned to a specific compiler version? The extension can download and manage a compiler itself: see IDE execution modes.
Going further
- The Language takes your models past a single flat argument: sub-conclusions, templates, splitting models, and the composition operators (assemble, refine).
- The runner (Homebrew, APT, or pip) makes justifications executable, all the way to CI/CD integration under Execution.