The jPipe IDE is a Visual Studio Code extension. It gives you
syntax highlighting for .jd files, validation as you type, completion, hover and go-to-definition,
plus a live diagram preview and export to SVG/PNG/JSON and more.
Those two halves come from different places. Everything the editor knows about the language ships inside the extension itself, so it works the moment you install it. Everything that produces a picture, the preview, the exports and the diagnostic view, is the compiler doing the work.
This page assumes you have already installed the compiler. If you have not, start there: it is one command, and it brings Java and Graphviz with it.
Install the extension
The extension is published on the Visual Studio Marketplace as jPipe Language (McSCert). Install it straight from that page, or from inside the editor:
- Launch Visual Studio Code.
- Open the Extensions view (
Ctrl+Shift+X/⇧⌘X). - Search for jPipe.
- Choose jPipe Language (McSCert) (publisher
mcscert) to be sure you have the official tool. - Click Install.
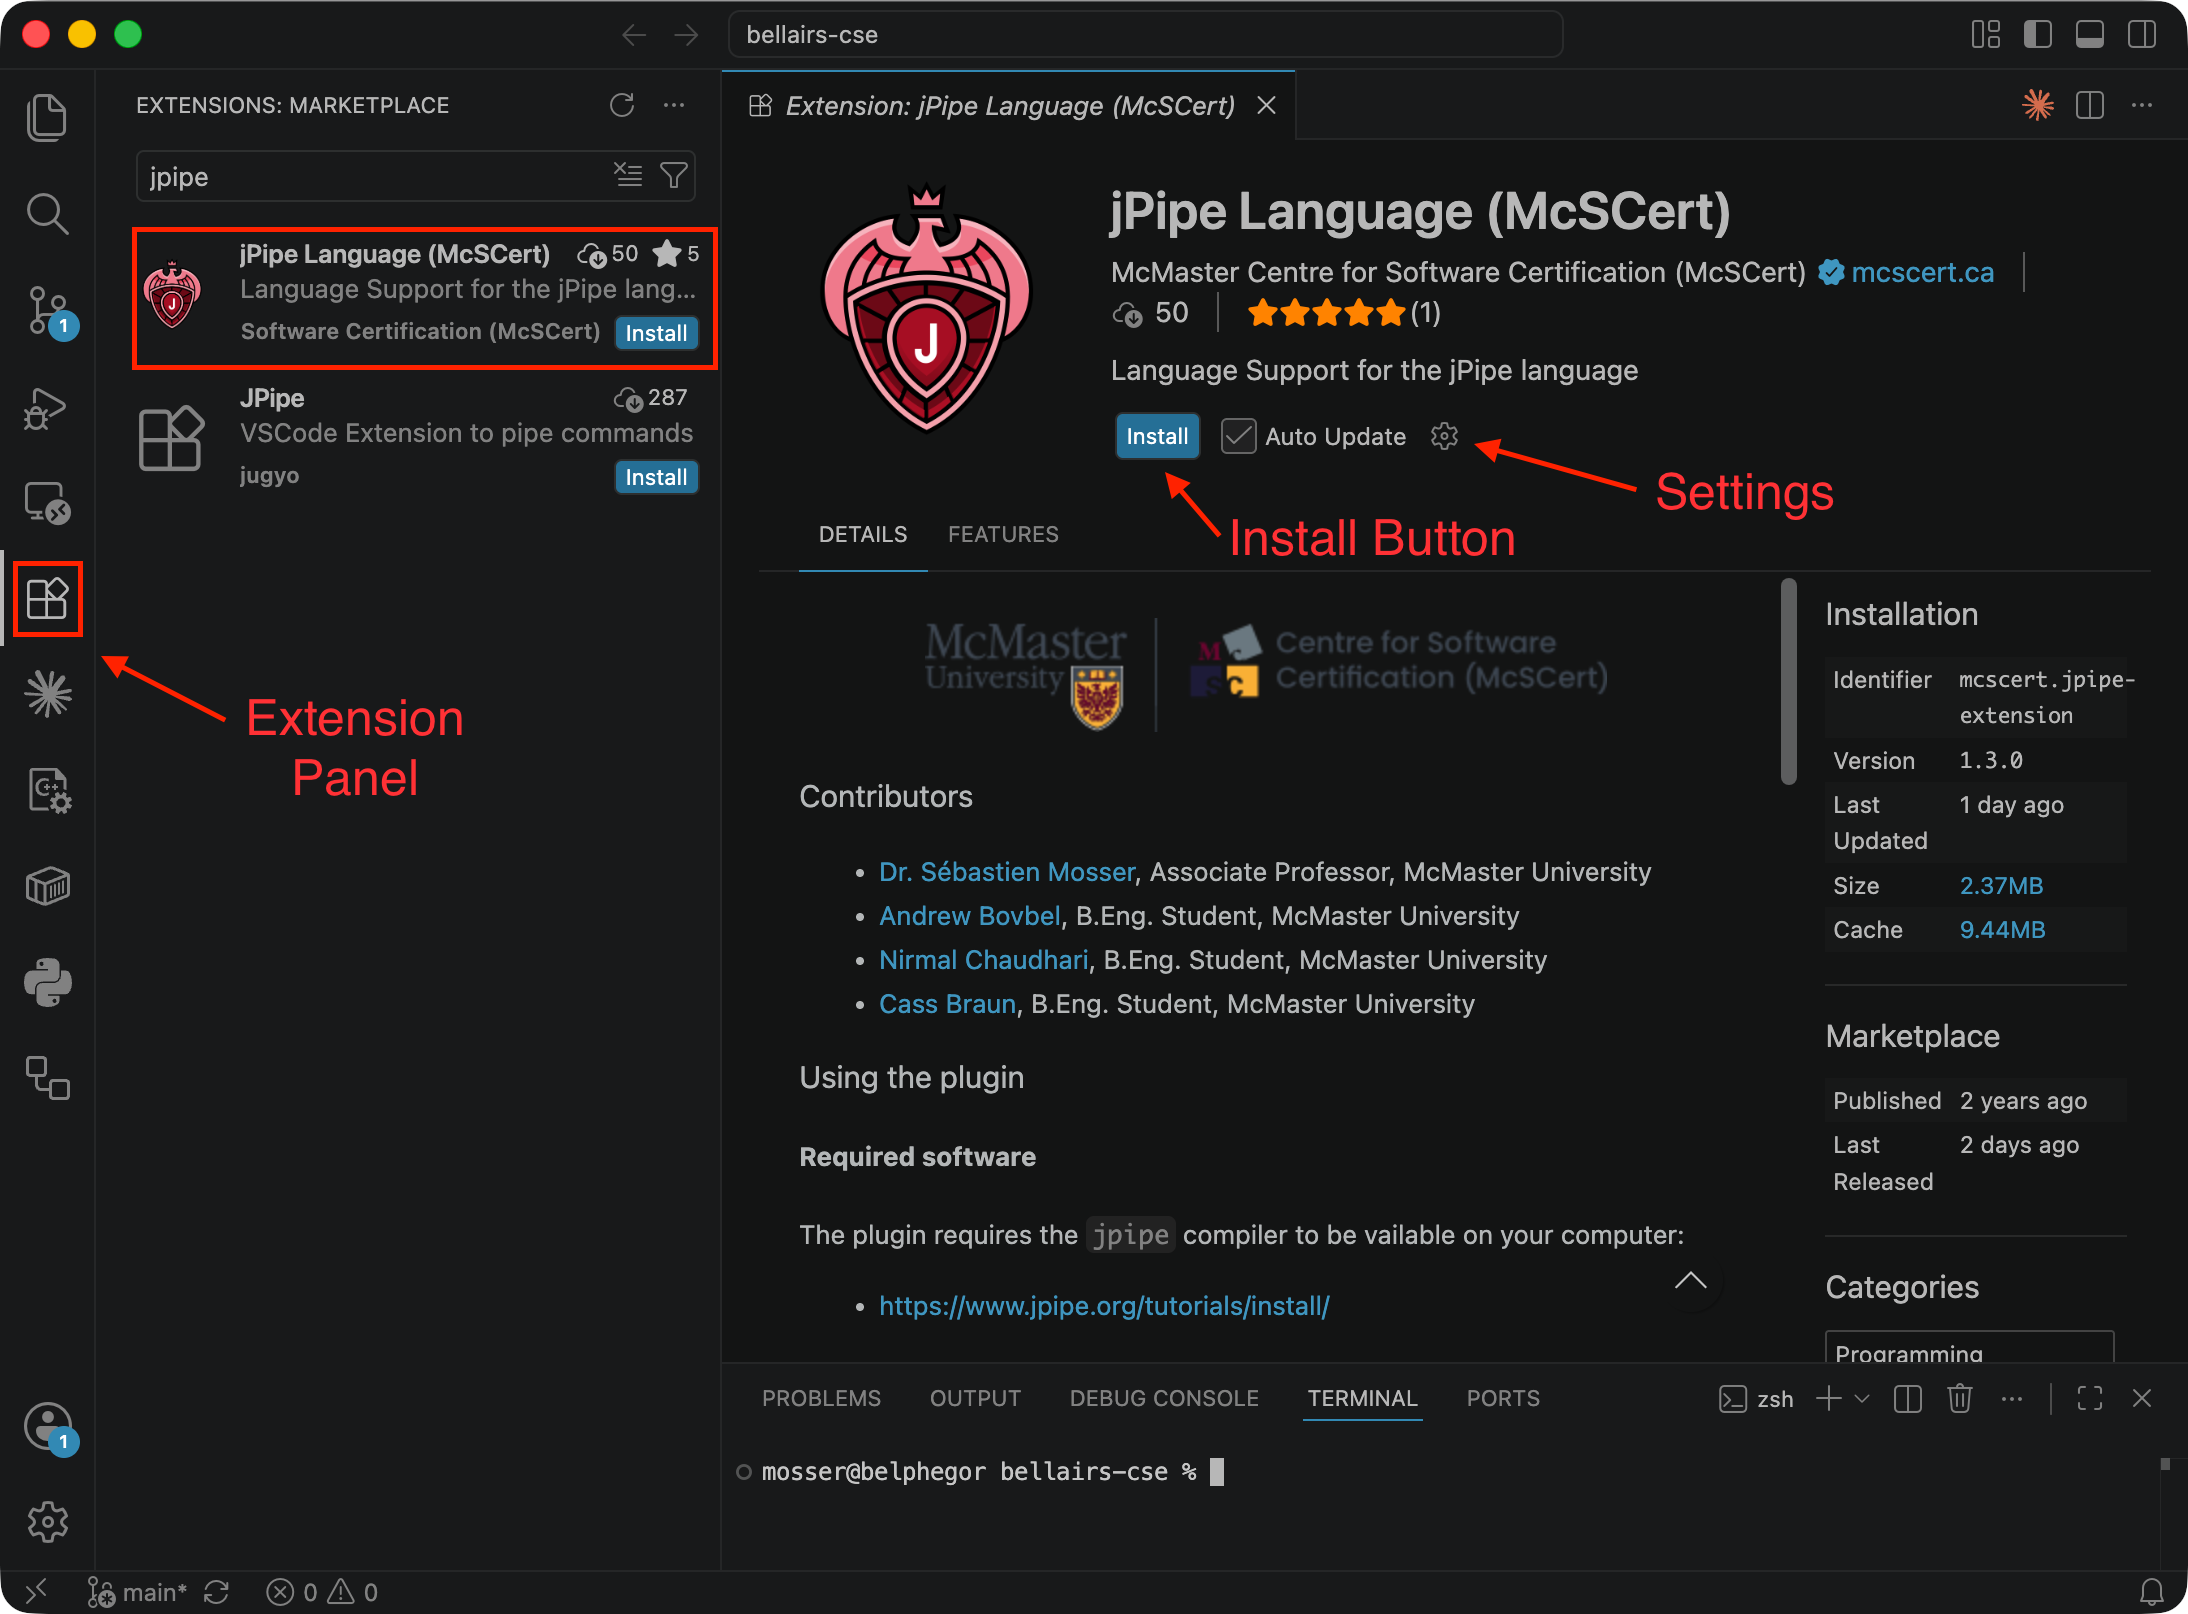
The extension activates automatically whenever you open a .jd (Justification Diagram) file.
That is the whole installation: there is nothing to point at your compiler. The extension ships in
cli execution mode with its CLI path set to plain jpipe, a name it resolves through your
PATH every time it runs the compiler. So it picks up the jpipe your package manager installed on
its own, and your editor and your terminal always run the exact same compiler.
Two situations do call for a setting: jpipe living somewhere unusual that is not on your PATH,
and wanting the extension to download and manage a compiler instead of using yours. Both are covered
in IDE execution modes.
Verify the setup
-
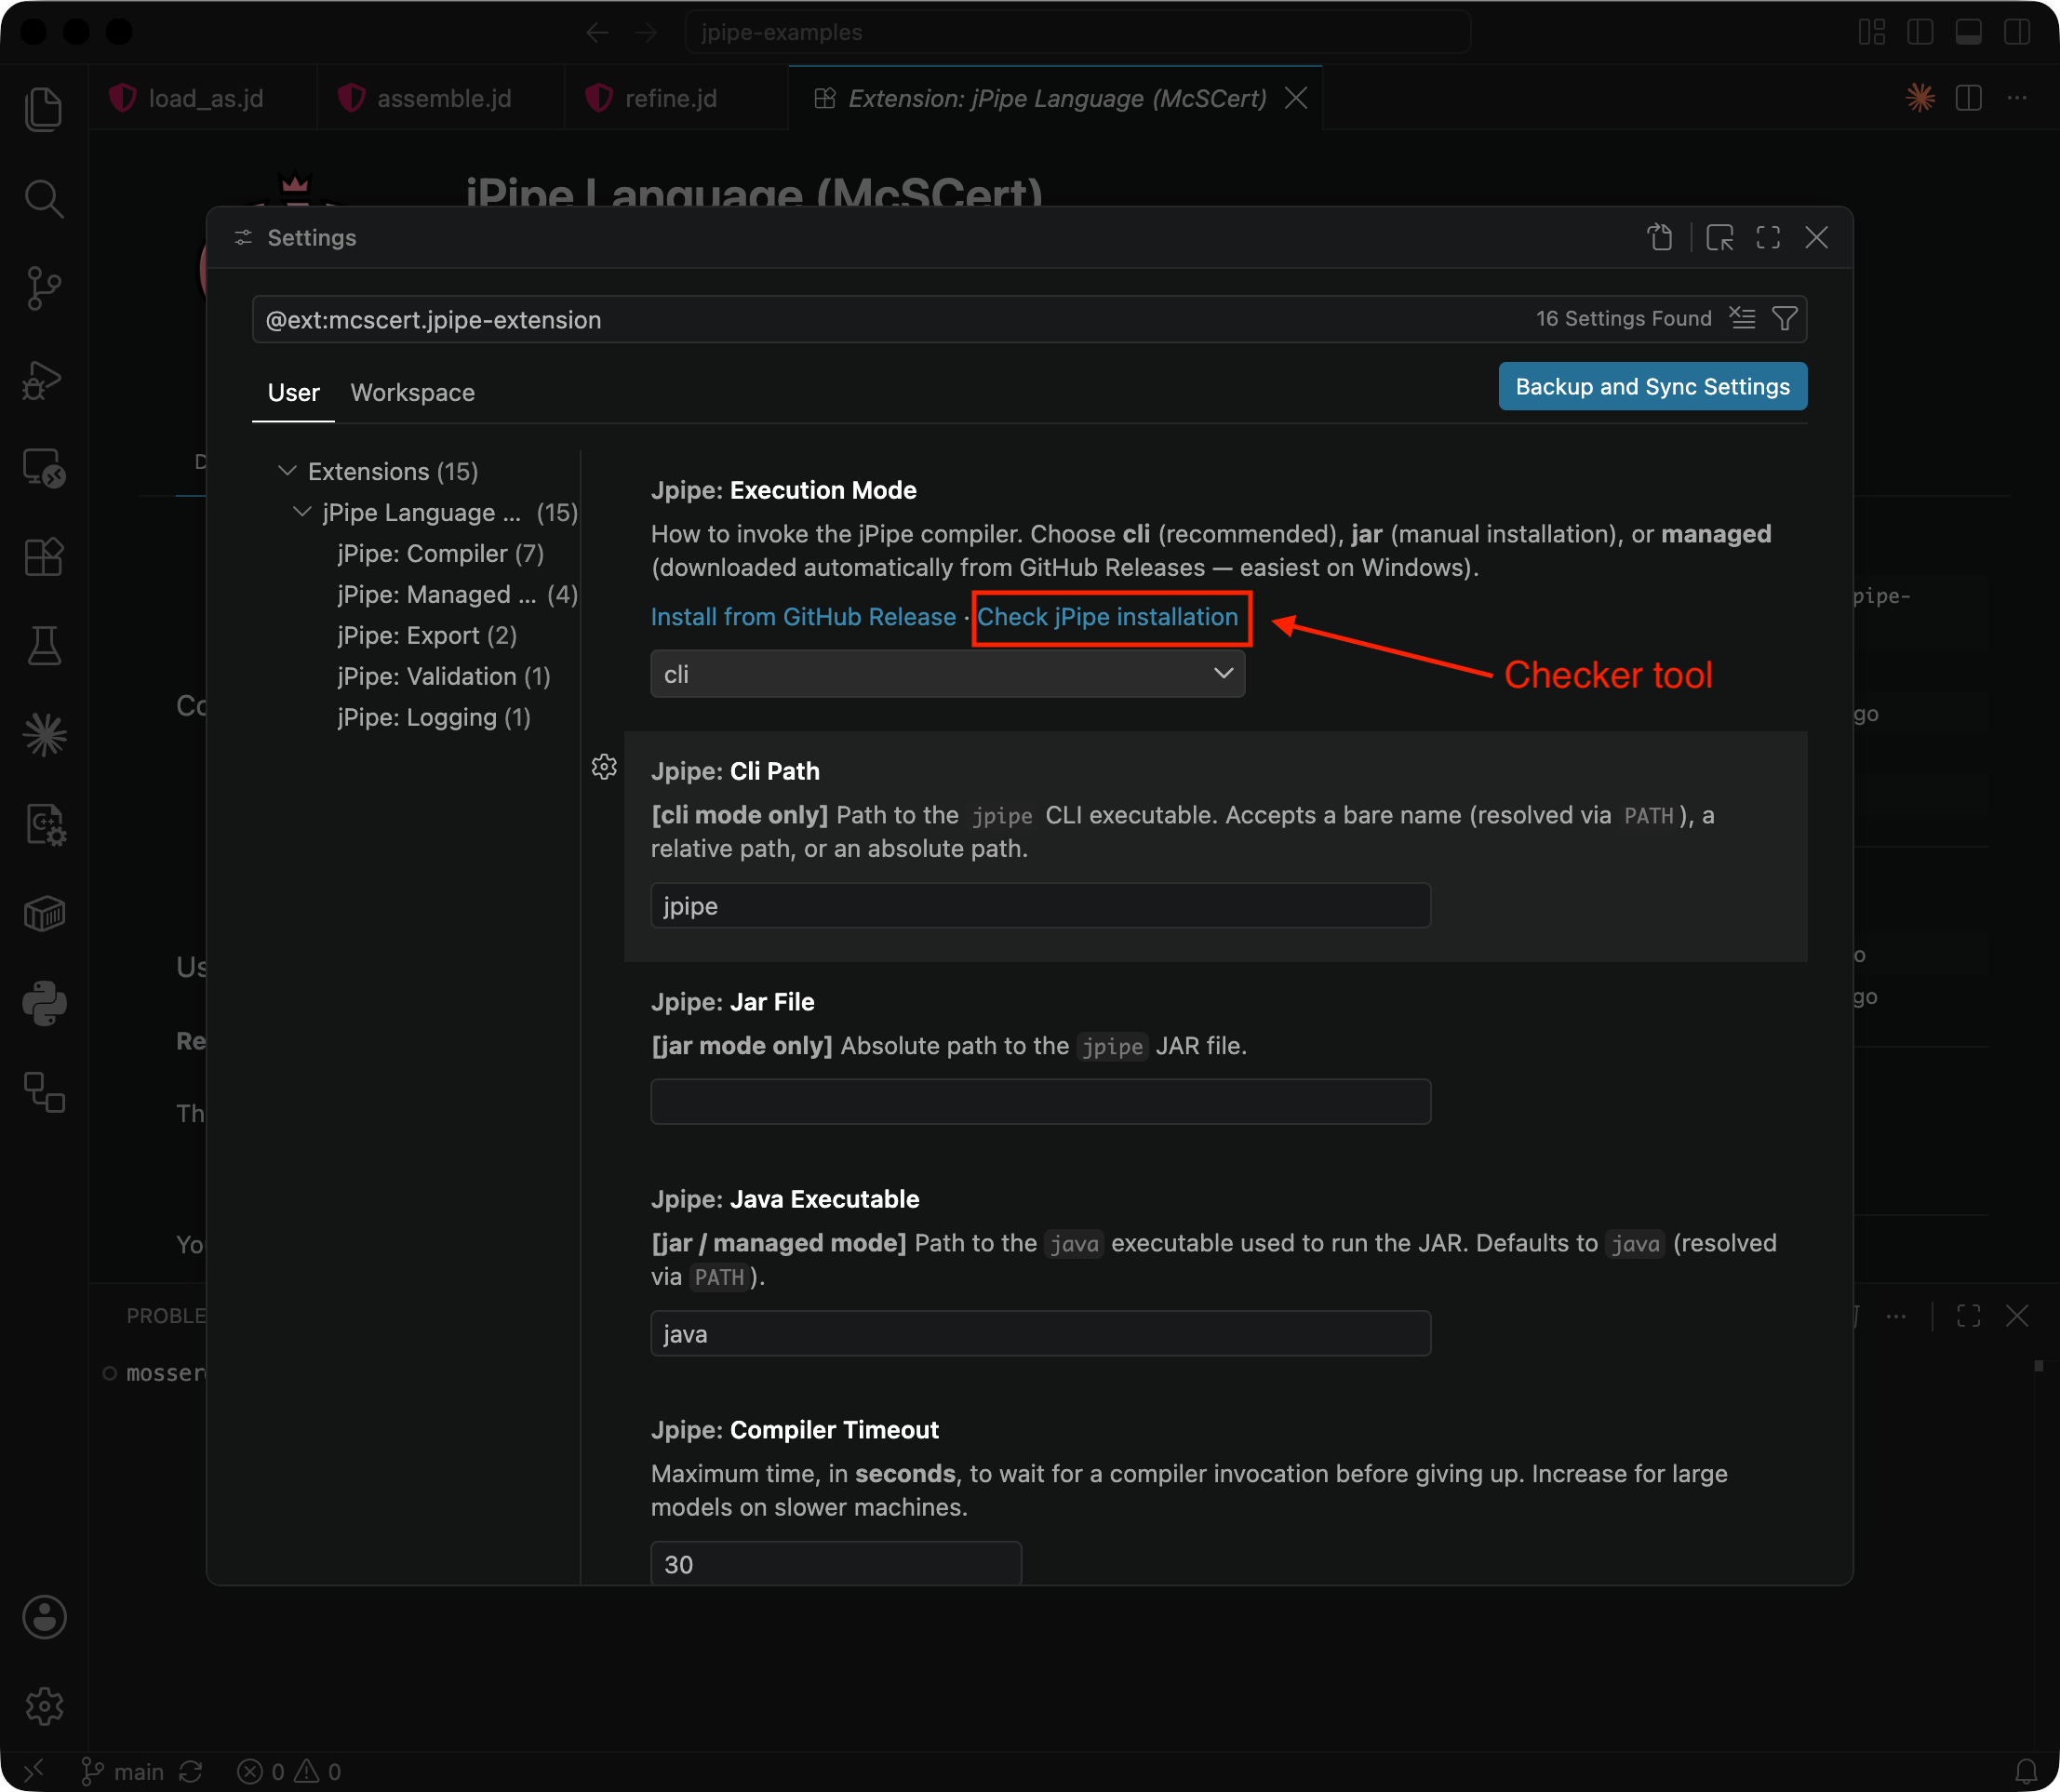
Open the plugin settings page (e.g., from the Extensions panel)
-
The first entry, Jpipe: Execution Mode, carries a Check jPipe installation link. Click it.
-
Read the report: it names the access method the extension used, the compiler version it resolved, and whether Graphviz answered.
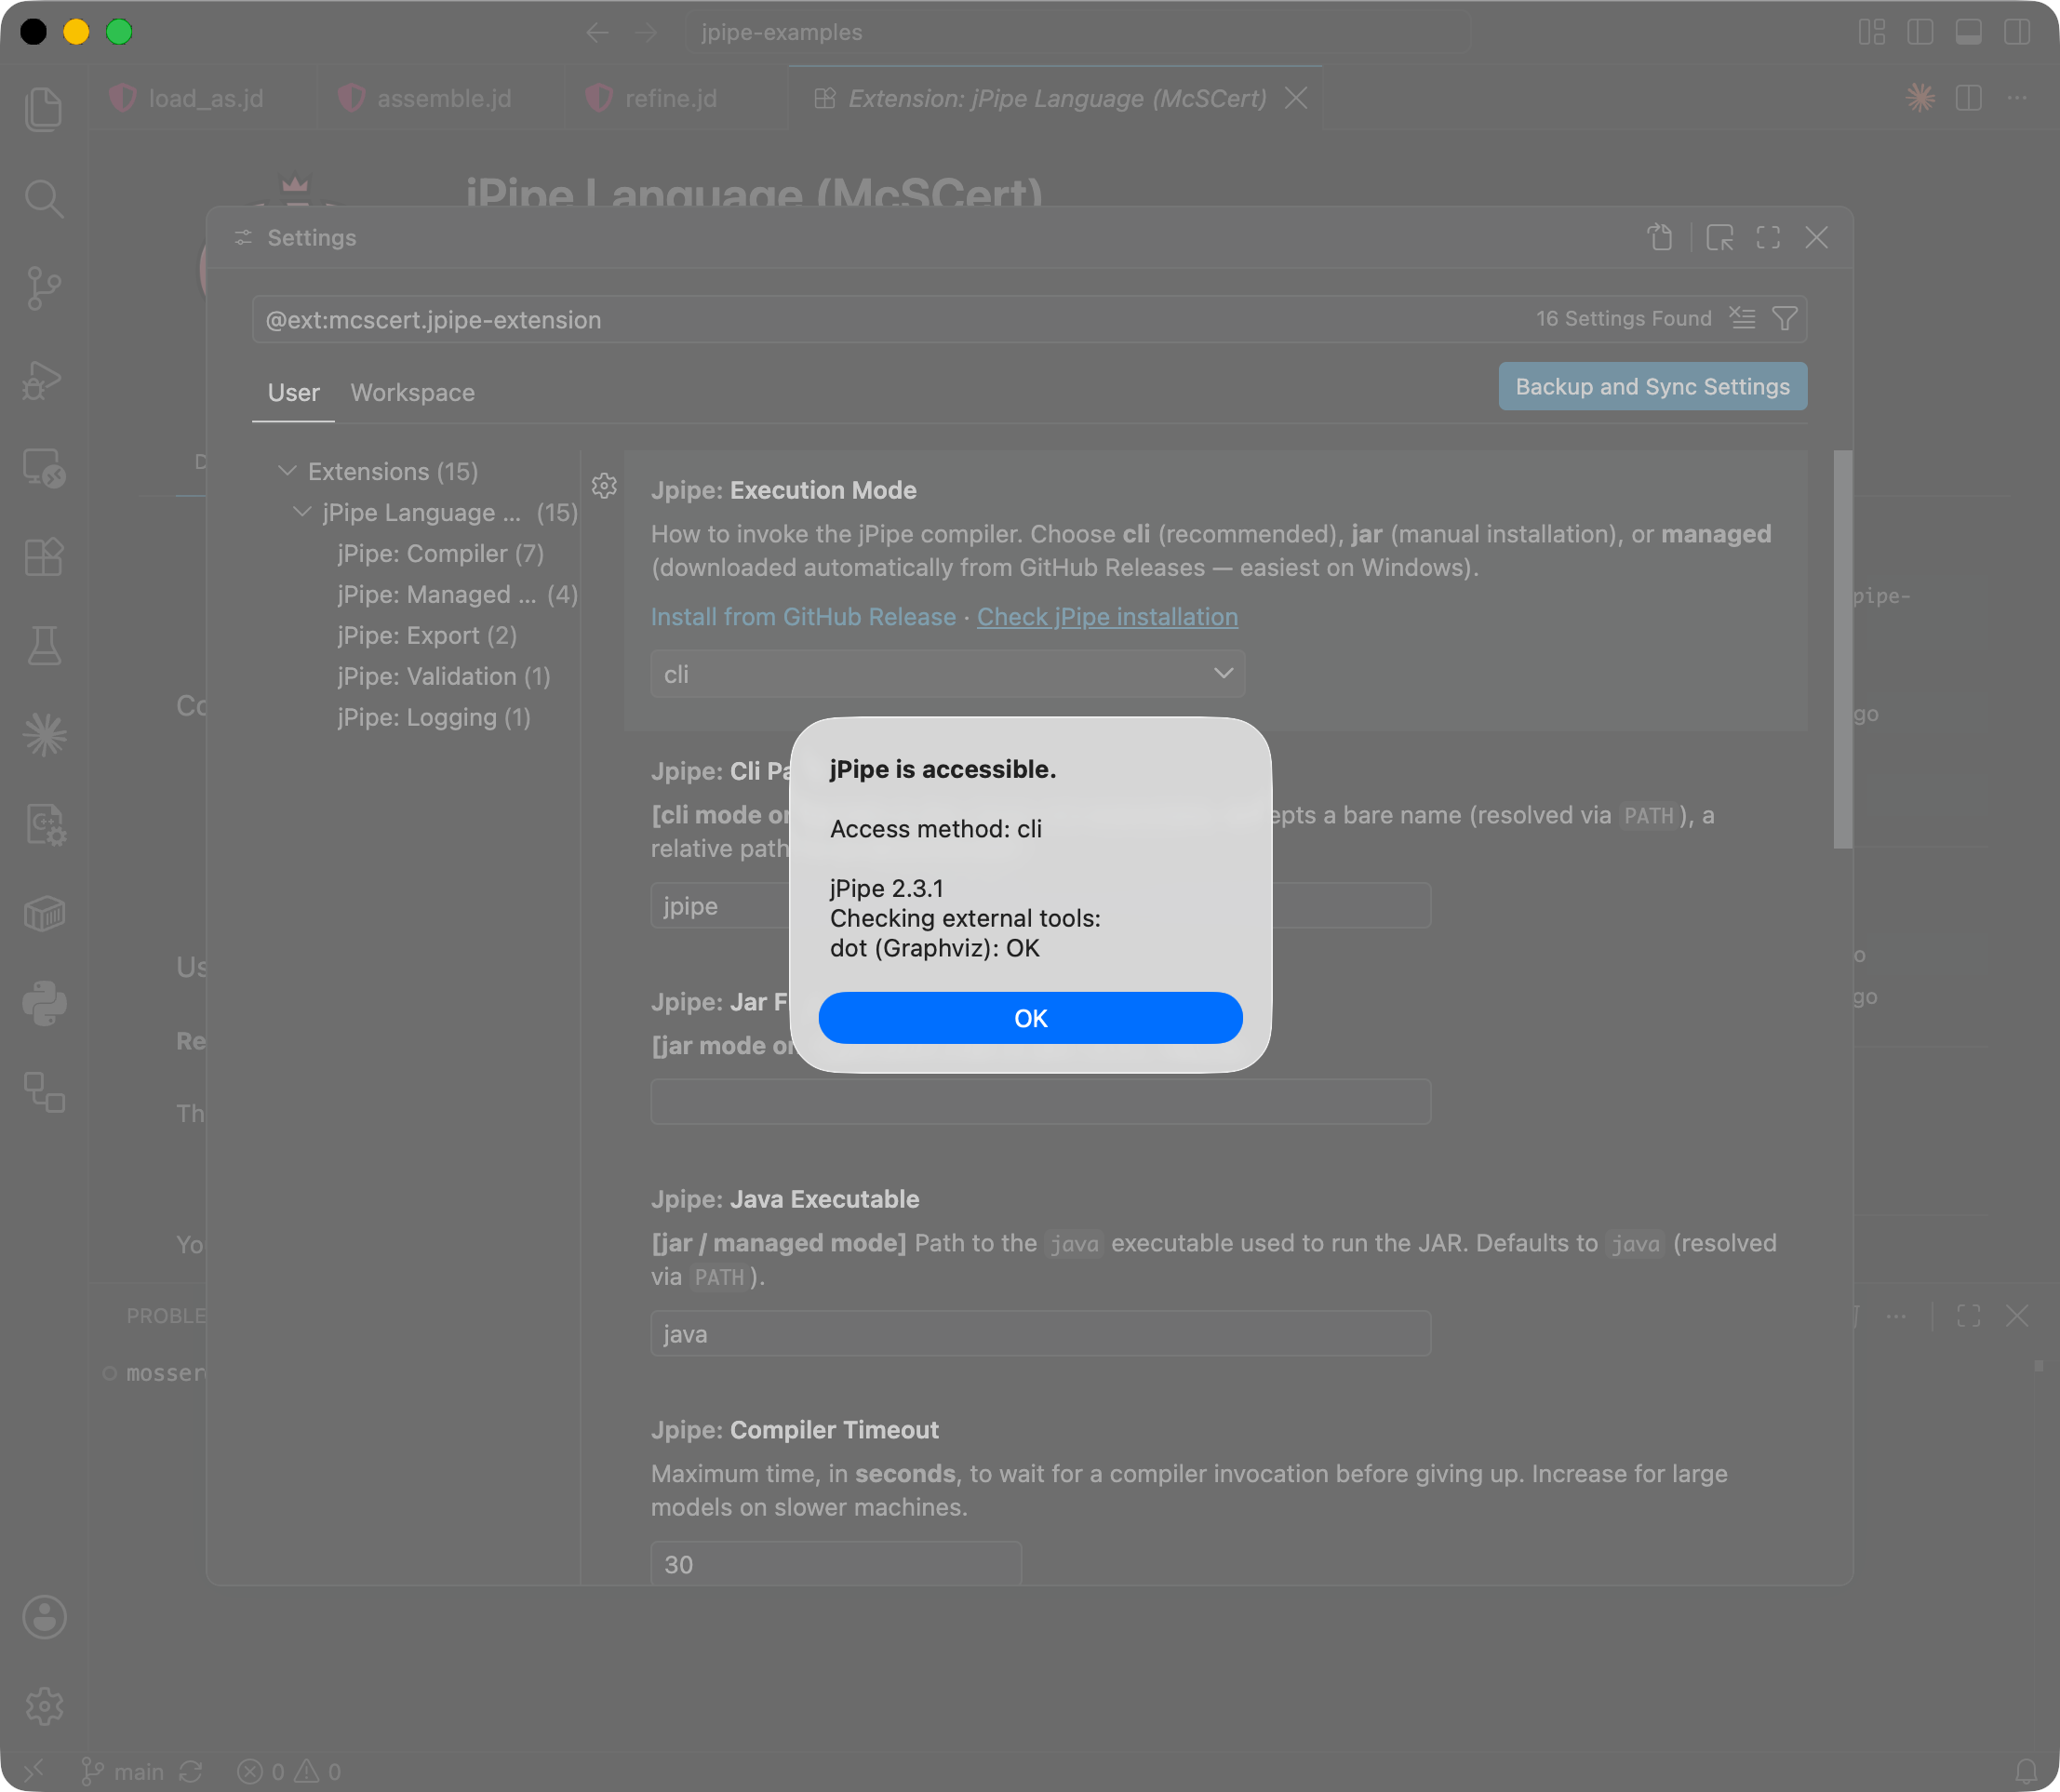
A healthy
clisetup reportsAccess method: cli, a jPipe version, anddot (Graphviz): OK. If the compiler cannot be found, the report says so instead, and IDE execution modes explains how to point the extension at it.
🎉 That’s it: you can now open a .jd file and see its diagram in the live preview.
Head to jPipe 101 to write your first model.
Next steps
- Write your first justification → jPipe 101
- No package manager on this machine, or a project that needs a specific compiler version? IDE execution modes covers letting the extension download and manage a compiler itself.