Overview
The jPipe ecosystem provides a robust framework for creating and operationalizing justification diagrams, a simplified version of Goal Structuring Notation (GSN) and the Toulmin model of argumentation.
The ecosystem consists of three primary components:
- jPipe Compiler: The core CLI tool used to process and validate your models.
- jPipe IDE: A Visual Studio Code extension for authoring
.jdfiles with syntax highlighting and real-time feedback. - jPipe Runner: The execution environment used to operationalize your diagrams, often integrated into CI/CD pipelines.
Installing the jPipe compiler
The compiler is the heart of the system. Choose the installation method that best matches your operating system.
🍎 Mac OS (via Homebrew)
If you use Homebrew, you can tap the McSCert repository and install the compiler directly:
$ brew tap jpipe-mcscert/mcscert
$ brew install jpipe
🐧 Linux & Windows WSL (via APT)
We support Ubuntu LTS versions (22.04 Jammy, 24.04 Noble) and the latest standard releases. You will have to add the McSCert Personal Package Archive (PPA):
$ sudo add-apt-repository ppa:mcscert/ppa
$ sudo apt update
$ sudo apt install jpipe
Troubleshooting:
- Command not found: If
add-apt-repositoryis missing, install the prerequisites:$ sudo apt update $ sudo apt install software-properties-common - Dependency Error: If you see
Depends: openjdk-25-jre but it is not installable, your distribution doesn’t include Java 25 by default. You will need to add the OpenJDK 25 PPA to your system to satisfy the requirement.
☕️ Manual installation
If you prefer not to use a package manager, you can run jPipe as a JAR file.
Prerequisites (Ensure both are in your $PATH):
- Java 25 (LTS) - JRE: https://www.java.com/en/download/
- Graphviz - https://www.graphviz.org/download/
Using an official release
- Visit the jPipe Compiler Release Page.
- Download the
jpipe-cli-<VERSION_NUMBER>.jarfrom the Assets section of the latest release.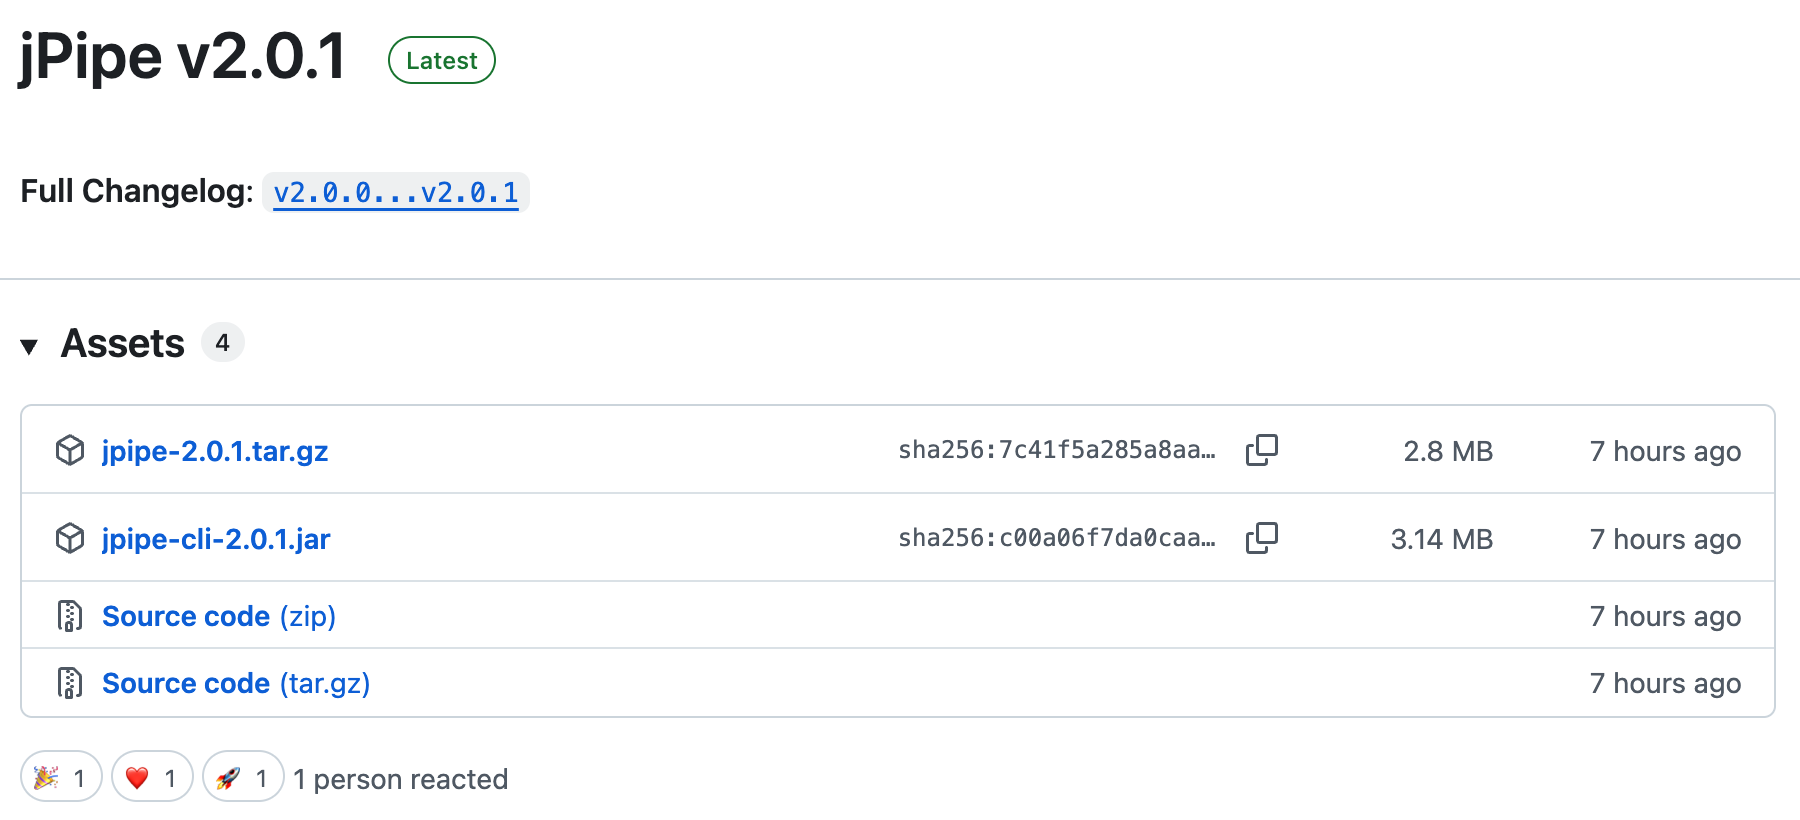
- Move the JAR to a local directory (e.g.,
~/bin). - Add an alias to your shell profile (
.zshrcor.bashrc):
alias jpipe='java -jar ~/bin/jpipe.jar'
Building from Source
- Clone the repository and build using Maven:
$ git clone https://github.com/jpipe-mcscert/jpipe-compiler.git
$ cd jpipe-compiler
jpipe-compiler $ mvn install
- Locate the generated file in
jpipe-cli/target/jpipe-cli-<VERSION>.jar. - Create an alias as shown in the manual steps above.
Installing the jPipe IDE (VS Code)
The jPipe IDE provides a specialized environment for building argumentation models. Note: You must have the jPipe compiler installed locally before using the IDE.
- Launch Visual Studio Code.
- Open the Extensions view (Ctrl+Shift+X).
- Search for “jPipe”.
- Select the version published by McSCert to ensure you have the correct tool.
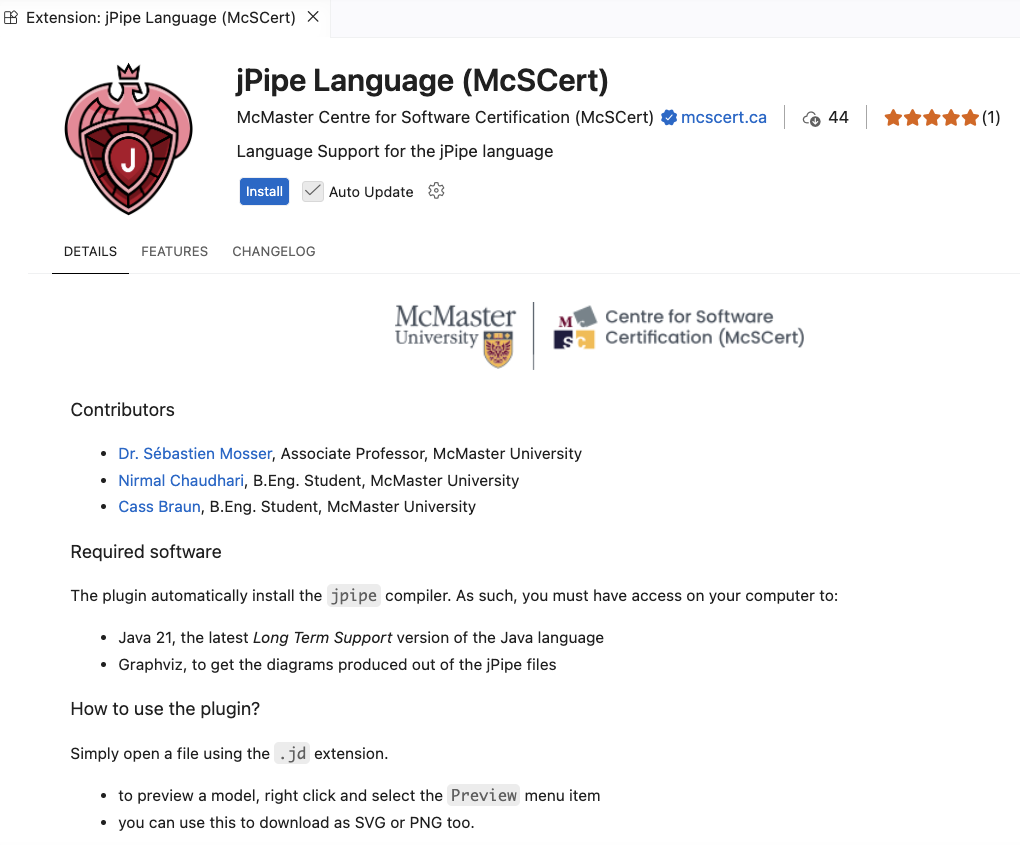
- Click Install.
The extension will automatically activate whenever you open a .jd (Justification Diagram) file.
Installing the Execution Environment (jPipe Runner)
The jpipe-runner is used to execute and validate your justification models.
🍎 macOS (Homebrew)
Assuming you have already tapped the McSCert repository for installing the compiler locally:
$ brew install jpipe-runner
🐧 Linux & Windows WSL (APT)
Assuming you have already added McSCert’s PPA for installing the compiler locally:
$ sudo apt install jpipe-runner
🐍 Python (Pip)
Run the following command:
$ pip install jpipe-runner
🩺 Check your installation
Run the following command to ensure that jPipe starts and can use Graphviz:
$ jpipe doctor
McMaster University - McSCert (c) 2023-...
    _   ___ _
   (_) / _ (_)_ __   ___
   | |/ /_)/ | '_ \ / _ \
   | / ___/| | |_) |  __/
  _/ \/    |_| .__/ \___|
 |__/        |_|

jPipe 2.0.1
Checking external tools:
  dot (Graphviz): OK
$
For the execution environment:
$ jpipe-runner -h
usage: jpipe-runner [-h] [--variable VARIABLE] [--library LIBRARY] [--diagram PATTERN] [--format {dot,gif,jpeg,jpg,pdf,png,svg}] [--output-path PATH] [--dry-run] [--verbose] [--config-file CONFIG_FILE] jd_file

McMaster University - McSCert (c) 2023-... - Version 3.3.0
    _ ____  _               ____
   (_)  _ \(_)_ __   ___   |  _ \ _   _ _ __  _ __   ___ _ __
   | | |_) | | '_ \ / _ \  | |_) | | | | '_ \| '_ \ / _ \ '__|
   | |  __/| | |_) |  __/  |  _ <| |_| | | | | | | |  __/ |
  _/ |_|   |_| .__/ \___|  |_| \_\\__,_|_| |_|_| |_|\___|_|
 |__/        |_|

positional arguments:
  jd_file               Path to the justification .json file

options:
  -h, --help            show this help message and exit
  --variable VARIABLE, -v VARIABLE
                        Define a variable in the format NAME:VALUE
  --library LIBRARY, -l LIBRARY
                        Specify a Python library to load
  --diagram PATTERN, -d PATTERN
                        Specify diagram pattern or wildcard
  --format {dot,gif,jpeg,jpg,pdf,png,svg}, -f {dot,gif,jpeg,jpg,pdf,png,svg}
                        Format for the generated diagram image.
                        Supported formats include: dot, gif, jpeg, jpg, png, svg
  --output-path PATH, -o PATH
                        Path to save the generated diagram image.
  --dry-run             Perform a dry run without actually executing justifications
  --verbose, -V         Enable verbose (info) output
  --config-file CONFIG_FILE
                        Path to the config .yaml file
$
With the compiler, IDE, and runner installed, you are ready to begin creating your first justification model.